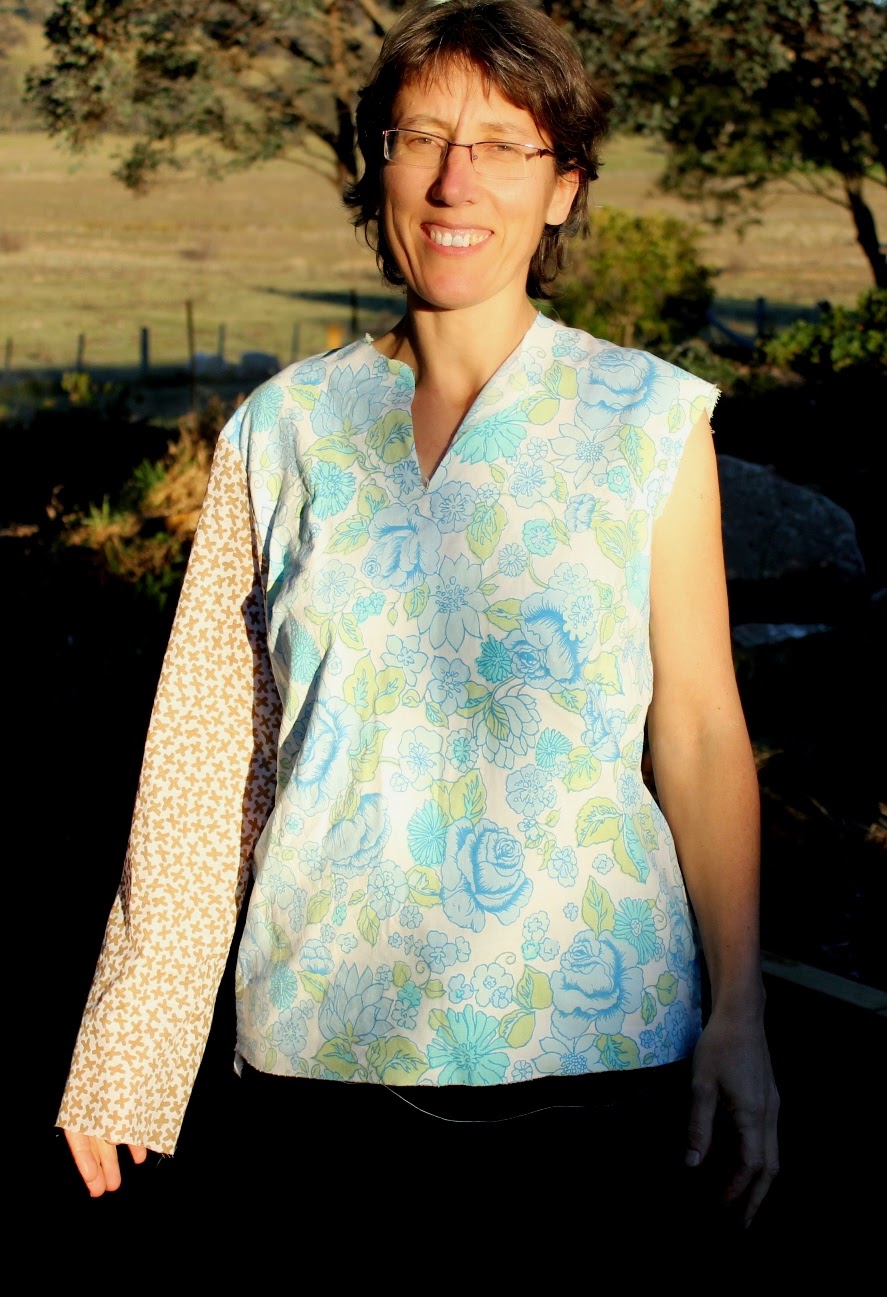
Wednesday, January 21, 2015

A Lane Raglan Tee and another Renfrew

Before: kind of hideous cowl-neck top from Yass Vinnies, I liked the colour and feel of the fabric. Hector looks a bit like a headless zombie holding this up for the photo...


After: a kind of respectable tshirt. I have forgiven Buster his heinous crime from my previous post (or maybe this photo was taken beforehand, I can't really remember).


The pattern is the Lane Raglan from Hey June. It's pretty popular in the sewing blog world. Very simple, I probably had several like it in the cobwebby pattern box but I am a bit of a sucker for the instant gratification of ordering a PDF pattern and receiving it a few seconds later. 


There wasn't enough of the green to get the sleeves out, so I used black ribbing, which I like the look of. Also for the neckline binding. The pattern was easy to follow and make but I don't like the way it has you finished the neckline  - you sew the neck binding on the flat and then sew up the last shoulder seam, it leaves a bumpy finish on the neckline that I had to sew down by hand. Next time I will just do it in the round.


Before #2: some cream and caramel (i.e light brown and medium brown) knit from Jamison Salvos in Canberra.

In the same box was a length of beige knit. 


After: another Renfrew top. I blogged about one of these here last year. (I made this one last year too, but am a bit sporadic when it comes to blogging completed projects, as you have no doubt noticed. I blame the slow-as-a-wet-week internet connection).


I like this one better than the previous version. I took out some of the excess sleeve length. I kept the overall length the same, but the difference in fabric ( this stuff is very stretchy) seems to have made it longer than the first one.


I was MOST impressed with myself with the stripe matching up the left hand side. Not perfect, but pretty close.

Not so much impressed with the right side.... you win some you lose some!


I also tried hard to cut the neckband so as to have an even stripe. I managed that pretty well if I do say so myself. It looks a bit wrinkled here but it's not actually.


Unfortunately the fabric was a little TOO stretchy and since sewing has lost of lot of its shape. But it's so snuggly soft I use it as a pyjama top. So no biggie. 

Monday, November 10, 2014

An exercise in futility

I thought it would be a good idea to make a dog bed for Buster. I used some opshop bits and pieces of heavy-duty, furnishing fabric. Here's Kai modelling it:

 We thought we were being very clever reusing the old frame of the kiddy pool (pool liner long since dead):


Buster wasn't too keen on it when he first saw it. 


He had to be encouraged on there...
  

And sat for approximately 2.5 seconds, 


Before showing me what he thought of it.


Oh no, wait. That's the wrong picture. THIS is what he really thought of it, less than 24 hours later....


It was so tragic, all I could do was shake my head and laugh. Oh, and tell Buster that he could sleep on the ground from now on...!

Monday, October 20, 2014

Old wool skirt + obi offcut = new apron

I bought a lovely lined, red woollen skirt for $1 at the Holbrook op shop about a year ago (no before picture). It was far too big but I thought I could easily cut it down to size.

It had other plans. After I cut too much off the sides, I thought I'd then add a blue panel from an obi offcut, off centre, to add the extra width back on before resewing the side seams.

Nope, that didn't work either! So to save balling it up and chucking it in the rag pile, I thought "Aha! I could do with a new apron." Et voila!


(Note; the girly looking legs in the photo actually belong to Hector. I thought he looked good with an apron in front of him so I left 'em in the photo).

I made the ties from the offcuts of the skirt sides where I had originally cut too much off. Added them either side of the original waistband, then simply hemmed the sides and bottom. 

Because the wool was a bit itchy I thought I would keep the lining intact. Who am I kidding, I just couldn't be bothered to trim it off!


So here it is in-situ (below). We all need a fully lined, woollen apron at least once in our lives, I figure (?) It's a shame really that I didn't make it work as a skirt, because looking at it in the photo below, it would be a pretty nice skirt! 


As an aside, those pants you can't see much of in the photo, are also 'something new from something old'... a red op shop sheet that I made up using my favourite drawstring pants pattern. I actually made them as pyjamas, but am currently short of long pants, so I renamed them 'long pants'. Oh dear, I need to get on to some serious clothes sewing! But am in the middle of a quilt for sister-in-law's 50th b'day so clothes are on hold...

Tuesday, September 2, 2014

Burda top, finally

I borrowed a pattern for this Burda top (below) from my friend Pat a few years ago now, it feels. (Thanks, Pat). It's been at the front of my sewing queue since then but always gets pushed back. At last - it's done!


I picked view B, as I'm not much fussed on collars and the skinny ties at the back of A put me off. I made a dress with all those ties back in 1996 and I still remember the faffing and fiddling around. Although what I remember most about that particular dress, though, is dropping my cigarette (bad old days) on my lap the first and only time I wore it, at a wedding. Hello, embarrassing burn hole. Goodbye, dress.

Back to this project: I even did a muslin to check the size first. How good is that? I wasn't going to show the photo but Vanessa insisted, so here you go: complete with bed sheet bodice and sleeve made with leftovers from the Washi top I blogged about here.


Stylish, no? I decided it fit ok but was a bit tight right down the bottom, so I graded it out to the next size up at the hemline. Otherwise no alterations.

I mostly used this fabric below; I think it came from one of the Goulburn op shops. It's a woven dark grey with pinstripes. Not all cotton, as it doesn't wrinkle much (and melts easily when you iron it, which I found out while making the top, ouch).


There wasn't quite enough for the whole top, so I was going to use a beige linen for the contrast panels down the side fronts. I even went as far as cutting out the front from that linen before realising that in fact they are NOT contrast panels at all and that the front panel is only topstitched on - the bottom part of the front is the same fabric as the sides. Confused? I was. In below picture of finished top, you can see what I mean.


After the beige option was pinned together (no photo) and modelled in front of my Thursday night sewing group I was kinda shouted down. 'Don't do it Kath!!' was the general consensus. So I acceded (well, they were right, it looked like crap). And recut a new front in black. 

The black is not preloved, I must admit - its linen/cotton I bought in Vietnam 6 years ago to make a pair of trousers for Hector. Oops. Sorry dear, no pants for you.

Here's a back view. The sleeves were way too long (or maybe my arms are short). I had to hem them double the depth stated on the pattern.


 And a couple of side shots:


I don't look too impressed in this last picture. Actually, unless you suck it in a bit, this design has a tendency to make one look about six months gone. Which I am not, though some of the side-on photos that didn't make the cut certainly suggested I was.


Conclusion? I actually really, really like it. It's easy to put on, super comfy and feels nice. I suspect that the back ties might be a bit annoying sitting in the car. And I'm glad I went with black and didn't have enough of the pinstripe to do the whole thing; I love the contrast and it gives it a Japanese-ish feel. 

What do you think? If you'd like to comment, I'd love to hear from you. Note: if you have subscribed to this blog as an email, which I think everyone has, then you have to visit the blog website to comment :) 


Sunday, August 24, 2014

Sew simple leggings

I love wearing my black boots, tights/leggings and skirts. But it's hard to find non-black leggings that are not hideously expensive, so I was interested to try this "Sew Simple" pattern for leggings. (Also because it was only $2.95 - bargain!)

I had some stretch pink/reddish knit fabric from an op shop that I was going to use for a long sleeve top, but decided to try the leggings pattern out on. So here they are (not with black boots, but with my next-favourite boots!)


True to its name the pattern was super simple. It only took about half an hour to make up. The waist is a little high and I'd lower it next time, plus I used too long a length of elastic, so I have to fold it over about 4 times to keep them up! But even so they are eminently wearable. Even though I have absolutely nothing in my wardrobe that goes with them, other than this dress (from Yass Vinnies, spotted by Kahli, thank you!). 

The same pattern website also has some good-looking free patterns. I downloaded the wrap dress. I think it could look very nice and it might be my next knit fabric project...


Friday, August 8, 2014

Two offcuts = a Renfrew top

Been a while between blog posts - kind of reflects the time between completed sewing projects. Have a few things in the pipeline, patterns cut out and the like, but haven't got to the point of actually finishing anything! Maybe it's a winter thing - I have been avoiding the cold of the sewing room lately in the evenings.

Here's one thing I did manage. I bought the Renfrew pattern from Sewaholic patterns a while ago - has been very popular on other sewing blogs for quite a while. If you google Renfrew top images you'll see about a million of them. 

I had found these two lengths of knit fabric in recent op-shop visits to the usual Yass and Goulburn haunts. The first is kind of beigey with blue graffiti-looking graphics on it. Almost 80s but not completely.


The second is just a plain blue knit with greyish overtones. Really nice and soft. Both pieces were about 1.5m long and I think only about $1 each.


The pattern comes in round neck, cowl neck and v neck options, and short, 3/4 or long sleeves. Pretty simple pattern and very easy to make up. Here's the front view: it's a bit overexposed so the colours are not quite right. It turned out mostly ok, though I think I could live without the hip/waist band. It looked good on the pattern envelope, of course, but I don't think it's terribly flattering on me!


I didn't test it as I was going along, and it was pretty obvious from the following pics that that I didn't check the sleeve length: it wrinkles up a lot when the cuff is at the right place.


Then when I pull it all the way down  it's about two inches at least too long. 


Overall I'm calling it a pyjama top - the colour combo makes it look like one. Here's the back view, in which you can see that either my posture sucks, or I am displaying a bit of inherited scoliosis....! 
I seriously thought I was standing dead straight. 


The hip band looks fine from the back but really not happy with it at the front. I would like to try the pattern again but I'll shorten the sleeves and maybe either leave the hip band off, or use the same colour as the body. I perhaps took the colour blocking theory a little far this time! 


Tuesday, July 15, 2014

The doona cover that keeps on giving

Last time I mentioned a doona cover that I had made a few things out of. I found it in one of the Goulburn op shops. Here's a picture of most of it: I'd already cut up a bit of it for a top. It was almost brand new and for $6 for metres and metres of fabric it was a steal!


Combined with an opshopped pillowcase, I turned the missing part into a top called a Scout Tee, which is basically a woven  tshirt pattern. Here's a pic - accessorised with the season's latest hats as made by Ellie and I for our local school fete ;) Are we stylish or what!


The top part is the pillowcase. It has a weird wavy pattern on it that would seriously hurt your eyes if it wasn't a light beige colour. Just the bottom part was from the doona. It's a very simple pattern to make up; no darts, no facings, just a bias binding edge on the neckline. It's not terribly flattering, since it's not at all fitted, but it is nice and cool to wear in summer. 


The back is also partly pillowcase and partly doona cover, but cut from the plain beige section. I wanted to have the whole back as the pillowcase fabric, but it didn't stretch to that. So the plain beige was a compromise.


Although it is very comfy to wear, I felt like it was a bit on the large size. So, I made up a second one the next size down using some floral fabric pinched off my Mum and some red broderie anglaise that I had bought to make Ellie something as a baby and never got around to it. So not really recycled, but at least repurposed!


I think this second version is a bit nicer than the first one. Unfortunately the red colour ran badly in the wash. I haven't let that stop me wearing it a lot. Taking these photos was tricky as it seems that every time I go out to do so, a big wind picks up. Nearly every photo looks like the one below, which I kept just for a laugh. I really have to pick my moment and use a fast shutter speed to take a picture that is usable.


The other thing I've made so far from the doona cover is a pair of drawstring pants. I love this pattern and have used it about a million times. It's Simplicity 7229 and I picked up the pattern in the Yass op shop a few years ago for 20 cents. I don't know if it's still in print, but I would highly recommend it for an easy pair of pants, shorts or A line skirt that is super comfortable. 


The reason it is so comfy is the yoke/waistband, which is cut on the bias. The pattern says just to add a drawstring but I use a piece of thin elastic and sew two shorter drawstrings to each end. This makes it much more comfy around the waist. I mostly made these pants to do my Tai Chi in - they are perfect for that. 

I liked how the pattern placement worked out. But the first person to see me wearing them laughed (not unkindly) and said that from a distance they looked like I had a pair of old fashioned lacy undies on.... 


I guess they kind of do. But I don't care. I still love them!